We all want to capture our daily moments beautifully, but stepping into the world of DSLR cameras can feel overwhelming at first. With all the buttons, dials, and settings, it’s easy to get lost.
The good news is, once we grasp the basics, a DSLR can become our ultimate companion for capturing memories—from bright landscapes to intimate portraits. Let’s explore step by step how to master the DSLR, starting from setup to creative shooting tricks.
Basic Setup and Buttons
When we first pick up a DSLR, the first step is basic configuration. Insert the battery and memory card, then use the top mode dial to select a shooting mode. Common options include Full Auto (green rectangle), P (Program Auto), Av (Aperture Priority), Tv (Shutter Priority), and M (Manual). Beginners can start with P or Av to get used to adjusting settings gradually.
On the back, the Q button quickly opens commonly used menus, AF-ON separates focus from shutter control, and the INFO button switches on-screen data. The top LCD shows shutter speed, aperture, ISO, and other core settings. At night, we can press the backlight button to see everything clearly. Don’t forget the AF/MF switch on the lens; in auto-focus mode, a half-press of the shutter activates focusing.
Putting the Exposure Triangle to Work
1. Aperture Control: Using Av mode, we can see how aperture affects our images. A wide aperture (f/1.4–f/4) blurs the background beautifully for portraits. A smaller aperture (f/8–f/16) keeps everything sharp for landscapes. For food shots, a medium aperture (f/2.8–f/5.6) helps the subject pop while keeping some context.
2. Shutter Speed: In Tv mode, speeds above 1/500s freeze fast-moving objects like birds, while slower speeds below 1/60s create light trails. Remember the “safe shutter” rule: keep your shutter speed at least as fast as the reciprocal of your lens focal length (e.g., 1/200s for a 200mm lens). Low light? Turn on image stabilization to slow the shutter by 2–3 stops safely.
3. ISO Sensitivity: Modern DSLRs handle ISO 1600–3200 without too much noise. Outdoors on sunny days, use ISO 100–400; indoors, ISO 800–1600 works well. Noise can be reduced in post-processing, but blown highlights can’t be recovered. Our rule: better underexposed than overexposed.
Mastering Focus
Entry-level DSLRs usually have 9 or 11 focus points. The center point is the most accurate and perfect for still subjects. For moving subjects, enable AI Servo (continuous focus) with burst mode. For portraits, focus on the eyes and keep the shutter half-pressed to lock focus while recomposing.
Special focus tips:
- Backlit scenes? Use the focus assist lamp.
- Low-contrast objects? Focus on edges or corners first.
- Macro photography? Switch to manual focus and move your body to fine-tune.
Live View can magnify 5–10× for pinpoint focus, though it drains the battery faster.
White Balance and Color Control
Auto White Balance (AWB) works for most situations, but sunsets look warmer with the “cloudy” preset. Shooting in RAW preserves all color info for flexible editing later. Creative modes include:
- Portrait: slightly softer colors and sharpness
- Landscape: boosts blues and greens
- Monochrome: simulates film grain
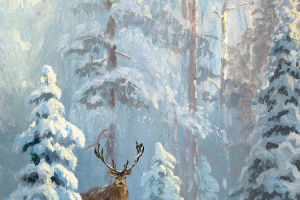
Snow? Increase exposure by 1–2 stops to avoid gray snow. Dark subjects? Reduce exposure slightly. HDR works for high-contrast scenes, but moving objects may ghost, so use a tripod and combine 3–5 bracketed shots.
Lens Choices and Care
Standard zooms (24–70mm) are versatile for daily shooting. Telephotos (70–200mm) compress space beautifully. Wide angles (16–35mm) create dramatic perspectives. UV filters protect the lens, but cheap ones can reduce quality. Clean lenses carefully: use a blower first, then a lens pen, and for stubborn oil, a proper cleaning solution.
Always back up with two cards and consider shooting RAW+JPEG for important shots. Keep firmware updated—new versions improve focus and battery life. Store batteries in a dry box (40–50% humidity) when not in use.
Practical Tips to Improve Shots
- Rule of thirds: place the horizon at 1/3 and the subject at intersections.
- Backlit portraits? Use a reflector or slow-sync flash.
- Waterfalls? ND filters enable long exposures.
- Night scenes? Turn off in-camera noise reduction; edit later.
- Customize buttons to quickly access favorite settings.
Check your EXIF data to understand which settings worked best. Photography is really about light—observing it at different times often beats buying expensive gear. Remember, the best camera is the one we carry with us, ready to capture life. Keep shooting, experimenting, and having fun!
Let’s Keep Shooting
Lykkers, with these tips, we can turn our DSLR into a tool that brings our vision to life every day. Practice, explore, and enjoy the magic of light and shadow—every shot is a new adventure waiting to be captured!